Work with layers in Photoshop
Learn how to use layers, apply filters, and change the blend mode in Photoshop, to make your own digital art.
Here’s a video to show you what we’ll be doing in this tutorial.

What you’ll need
Sample files to follow along: Oleander.jpg, Portrait.jpg, Blur.jpg
Step 1 Start a new document
Launch Photoshop and create a new document (3199 Pixels x 2880 Pixels).
Paste Oleander.jpg into Layer 1.
Duplicate Layer 1 (Cmd-J on Mac or Ctrl-J on Windows) and rename it Layer 2.
Apply filter to Layer 2: Filter > Filter Gallery > Stylize > Glowing Edges (Edge Width = 1, Edge Brightness = 4, Smoothness = 2).
Set the blend mode of Layer 2 to Color Burn.

Step 2 Add more layers and effects
Duplicate Layer 1 and rename it Layer 3. Drag it to the top of the layers panel.
Set the blend mode of Layer 3 to Hard Light.
Add a new layer Layer 4 above the other layers and paste in Blur.jpg.
Set the blend mode of Layer 4 to Exclusion.

Step 3 Add the focal image and enhance
Create a new layer Layer 5 above the other layers and paste in Portrait.jpg.
Set blend mode of Layer 5 to Darken and lower the opacity to 38%.
Duplicate Layer 5 and rename it Layer 6. Add a filter: Filter > Filter Gallery > Brush Strokes > Sumi-e (Stroke Width = 6, Stroke Pressure = 0, Contrast = 10).


Step 4 Blend the focal image
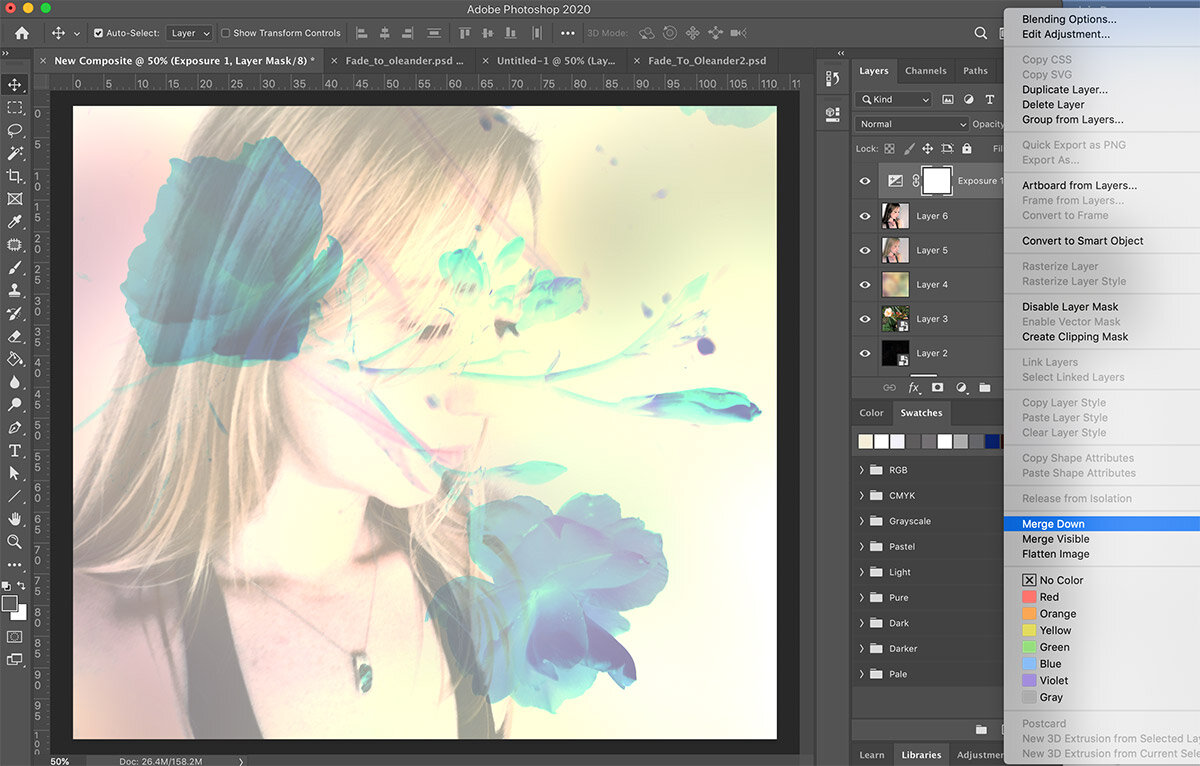
Add an Exposure adjustment layer over Layer 6 (Exposure = +0.93, Offset = +0.1453, Gamma Correction = 1.26).
Select the Exposure layer in the Layers panel, right-click and choose Merge Down, to merge with Layer 6.
Set the blend mode of Layer 6 to Pin Light and the opacity to 38%.

Step 5 Final effects
Duplicate Layer 5 and rename it Layer 7. Move it to the top of the other layers.
Add a filter: Filter > Filter Gallery > Stylize > Glowing Edges (Edge Width = 2, Edge Brightness = 6, Smoothness = 14).
Set the blend mode of Layer 7 to Difference and the opacity to 55%.
Duplicate Layer 4 (the blur image) and rename it Layer 8. Move it to the top of the other layers.
Set blend mode of Layer 8 to Hue. That’s it. (Remember to save your artwork.)


See more

Check out these colourful desktops I made by exploring and experimenting in Photoshop (all made by using the technique demonstrated in this tutorial :)